Damage Prevention

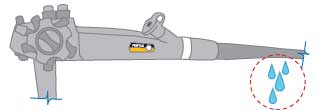
Leakage from the Bending Rubber Sheath
-
Indication
- During dry leak test the needle in the gauge may fall

- During wet leak test a trail of bubbles may emerge from the scope's distal bending section
- Failure to immediately detect a leak could result in optics malfunction (Charge-coupled Device [CCD] blackout, image distortion, etc.) or other fluid damage
- During dry leak test the needle in the gauge may fall
-
Common Causes
- Inadvertent contact with sharp-edged objects such as needles, forceps, fingernails, bed frames, etc.
- Accessories that are reprocessed in the same container as the scope
- Scraping insertion tube against storage cabinets or wire mesh filters inside automatic scope reprocessors
- Scraping of insertion against a patient's teeth
- The weight of metal connectors or fittings from multiple scopes placed on top of the distal bending section
-
Prevention
- Check for sharp edges on all surfaces of an automated cleaning/reprocessing unit
- Store endoscopes in a dedicated, well-ventilated cabinet with no sharp protrusions
- Do not grasp, carry or pull the scope by the distal bending rubber
- Avoid placing heavy parts or accessories on top of the scope
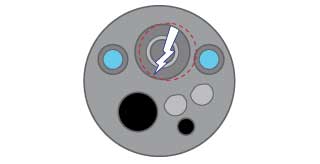
Cracked Objective Lens/Light Guide Cover Glass
-
Indication
- Shadow or distortion of the endoscopic image

- Shadow or distortion of the endoscopic image
-
Common Causes
- Impact to the tip of the scope against a table, wall, storage cabinet, metal sink, etc.
-
Prevention
- Avoid any impact of the distal tip or the light guide prong of the endoscope with any hard surface during handling, storage or reprocessing of the scope
- Properly align the PVE connector when inserting the scope into the processor
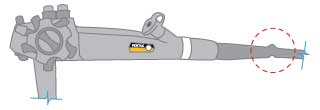
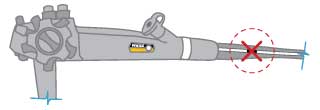
Damage (buckles, bumps, kinks, or wrinkles) to the insertion tube and/or umbilical cable
-
Indication
- Raised or depressed areas along the circumference of the insertion tube or umbilical cable

- Raised or depressed areas along the circumference of the insertion tube or umbilical cable
-
Common Causes
- Acute bending of the scope during cleaning and handling
- Use of or prolonged exposure to harsh chemical or antimicrobial agents
- Being rolled over or stepped on
- Excessive heat
- Being trapped in the cabinet door
- Patient bite
-
Prevention
- Avoid acutely bending the scope at any point, particularly where the flexible portion is connected to a rigid portion.
- Use only PENTAX compatible cleaning solutions. Do not overexpose scope to solution (check manufacturer specifications)
- Avoid tightly looping the scope while cleaning in a basin or sink
- Avoid grasping onto the umbilical cable while pulling the scope out from the processor. Instead hold onto the plastic (PVE) connector housing
- Never autoclave an endoscope
- Avoid over-coiling an endoscope in the sink
- Ensure proper handling of the scope
Clogged Air or Water Channels and Nozzles
-
Indication
- Minimal or no air or water delivery

- Minimal or no air or water delivery
-
Common Causes
- Improper or incomplete pre-cleaning and cleaning procedures resulting in the accumulation of patient debris within the air or water channels and nozzles; solidification of debris occludes the channels and nozzles and blocks the flow of air or water
- Chipped O-rings
-
Prevention
- Immediately after removing the endoscope from the patient, wipe down the scope, turn the air pump switch on the light source processor to its highest pressure setting, set the level on the air/water bottle to the "drain" position, force air through the scope, in effect purging the air and water channels of the endoscope
- Immerse the scope in enzymatic detergent
- Inject enzymatic detergent through all channels of the scope (using the channel-cleaning adapters provided)
- If the distal nozzles of the scope are blocked, the scope tip should be soaked in an enzymatic detergent for approximately 10-15 minutes.
- Immediately after soaking, the distal nozzles should be cleaned with a lint-free cleaning cloth
- Complete a visual check of the O-rings and replace any chipped ones

